How To Add Search Bar To Navigation Menu
It is not a secret that the menu is the most convenient, simple, and fast way to navigate. Also, existing research shows that most people look for a Search Bar even if a website consists of only a few pages. That's why a combination of the navigation bar and the search input field is so important to the success of your website.
In this post, I will describe how to add a Search Bar to your navigation panel.
What is a Search Bar?
The Search Bar, also known as the search field, query box, or input box, is a UI component that allows users to enter a search query. Its main purpose is for users to give input to an application. The user enters text into the search bar and clicks the "Go" button to initiate a search. The user can then view the matching results of the search query in a results list.
The Search Bar for websites is a great way to increase your website revenue. The input box is the first thing all visitors see on your website and is the equivalent of having an employee at your visitor's service. The search function will encourage customers to stay on your page longer, allowing you greater opportunity to entice them into purchasing your products.
Adding a search bar to a website allows visitors the ability to immediately start looking for what they need on your website. The query input box can be placed in the top or right of the pages and can allow visitors to search for specific products, services, etc. It is a great feature for any online business!
Add New HTML Element
With this all-in-one online application, you can add a search box to your navigation menu bar, just with a few clicks of the mouse. You don't need to be a developer or have any programming skills to create a search bar for your website.
Open the Structure Tree and click on the "Add HTML Element" button; the new element will be added to the menu structure.
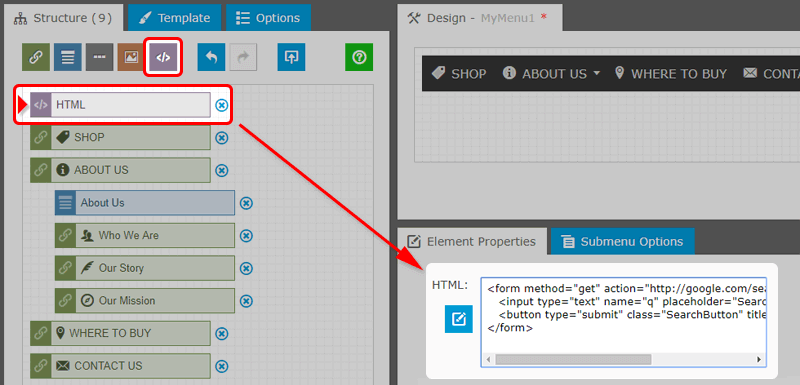
Next, insert the input box's code into the HTML element. Below is the basic sample (it opens Google Search in a new window):
<form role="search" method="get" action="https://google.com/search?q=" target="_blank">
    <input type="text" name="q" placeholder="Search..." />
    <button type="submit"></button>
</form>
The form element is used as a wrapper. The input element is used as a search field. The button is required to submit the form.
The input element has the attribute name="q". The q is the most common name given to search inputs. When submitted, the data name/value pair sent to the server will be q=searchterm.
To search within a specific website (for example "microsoft.com"), use the code sample below:
<form role="search" method="get" action="http://google.com/search?q=" target="_blank" onsubmit="this.q.value='site:microsoft.com '+this.s.value;">
   <input type="text" name="s" placeholder="Search..." class="SearchText" />
   <input type="hidden" name="q" />
   <button type="submit" class="SearchButton" title="Submit the search"></button>
</form>
Style Your Search Bar
By default, the Search Bar looks a bit outdated. To improve the appearance, we use CSS (Cascading Style Sheets) code.
The final complete code consists of the CSS section and the HTML form. The submit button is accompanied by the magnifying glass icon. Placeholder text helps your users know what to enter in the search bar. It provides sample data, so users don't have to guess what kind of information they should enter, and can help prevent users from entering incorrect information.
<style type="text/css">

.SearchText
{
   border:solid 1px #AA822F;
   border-radius:4px;
   padding:4px;
   padding-right:32px;
   width:180px;
   height:18px;
}

.SearchButton
{
   border:none;
   background-color:transparent;
   margin-right:6px;
   margin-left:-24px;
   line-height:16px;
   height:16px;
   cursor:pointer;
}

.SearchButton:before
{
   font-size:16px;
   font-family: 'MG_Icons', 'MG_Icons24';
   content: "\e72c"; /*magnifying-glass*/
   color: #CC9B39;
}

</style>

<form role="search" method="get" action="http://google.com/search?q=" target="_blank">
   <input type="text" name="q" placeholder="Search..." class="SearchText" />
   <button type="submit" class="SearchButton" title="Submit the search"></button>
</form>
Set the Location
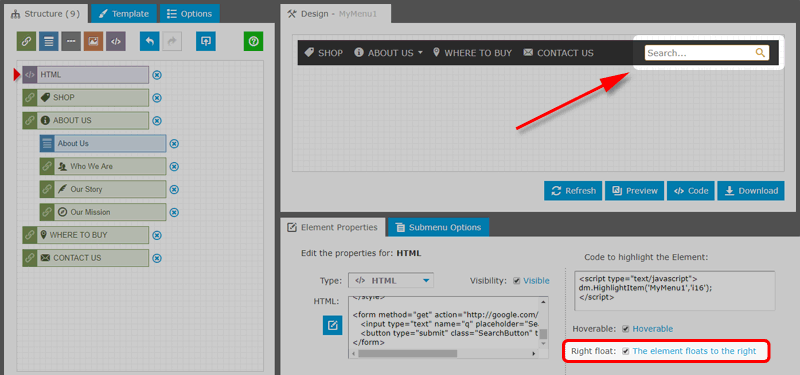
For search, users first look at the upper-right corner of the page layout. Thus, it is strongly recommended to place the search bar on the right side of the menu. In order to achieve that, just select the search bar element and enable the "Right float" checkbox.
If there is not enough space in the menu panel, make the Search Bar a dropdown element. It's easy.
Create the additional Link element, which has only the magnifying glass icon. Next, drag the Search Bar element and put it underneath the "magnifying glass" element with a small indent on the left.
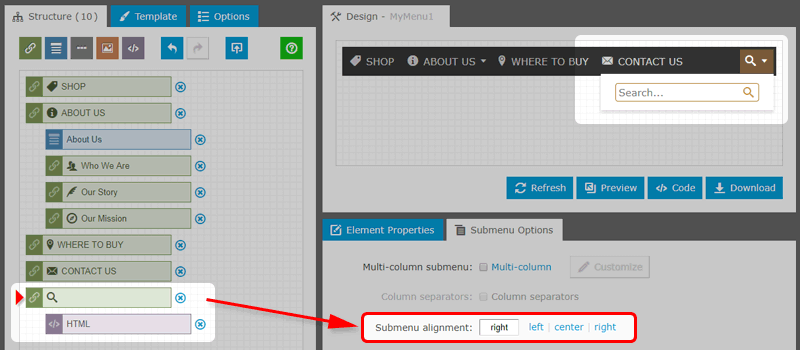
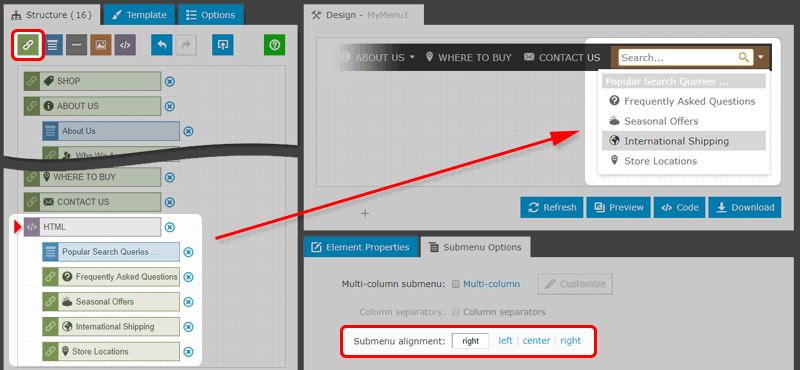
Finally, set the Submenu Alignment property. It specifies the horizontal submenu position relative to its parent element. Select the "magnifying-glass" element (just click on it), open the Submenu Options, and set the property value to the Right.
Further improvements
To provide a better user experience, you can add a dropdown list with relevant links. For example, it could be the frequently used search queries.
Just add new Link elements to the structure and put them underneath the search bar element with a small indent on the left. If required, set the Submenu Alignment (for the search box) to the Right as described above.
The submenu with relevant links appears when the user moves the mouse pointer over the search bar element.
Live Demos
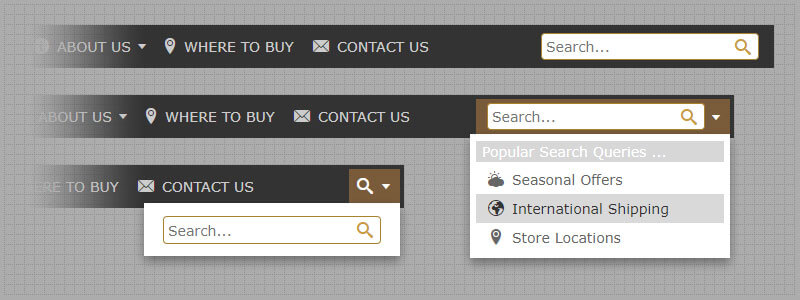
This example demonstrates the navigation bar with the search input box on the right. The second example has relevant sub-links, which appear when the user moves the mouse pointer over the search input field.
Conclusion
I hope this short post will help you to create a professional navigation menu, which includes Search Bar as a must-have tool for any website. If you need technical assistance, please contact us.
Links